FROM PHOTO TO QUILT
PICTURE PERFECT QUILTS
In 2008, Rochelle had the honor of being
Nancy Zieman’s guest on Sewing with Nancy
during a two-part series
entitled Picture Perfect Quilts.
Nancy and Rochelle detailed the process of creating a photo quilt.
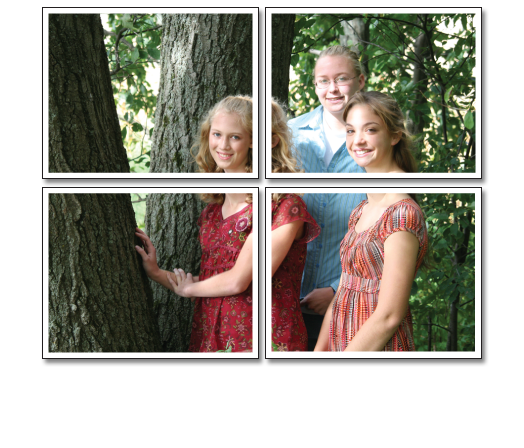
The key elements of turning a photo into an art quilt are enlarging and tiling the photo and printing on 8-1/2″ x 11″ sheets of fabric which are fused to heavy duty freezer paper. Most home printers include software for tiling.
If you make a wall hanging using these techniques, Rochelle would love to see it. Email a photo to: info@rochellestibb.com. Let her know if you would like to have the photo posted on this website. Please provide a little description and the finished size. Thanks — Looking forward to seeing your projects.


A LITTLE INK, FABRIC, AND THREAD
The Construction Process
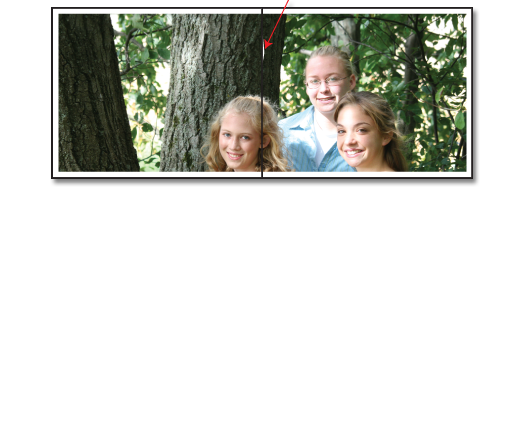
- Tile your image using .25″ margins and .5″ overlap.
- Print photo unto 8.5″ x 11″ treated fabric which is fused to heavy duty freezer paper using your inject printer. Remove freezer paper backing and rinse fabric.
- With right sides together, using .25″ seam allowance stitch the fabric pieces together forming rows. Press seam allowances open.
- With right sides together, using .25″ seam allowance stitch the rows together forming the quilt top. Press seam allowances open.
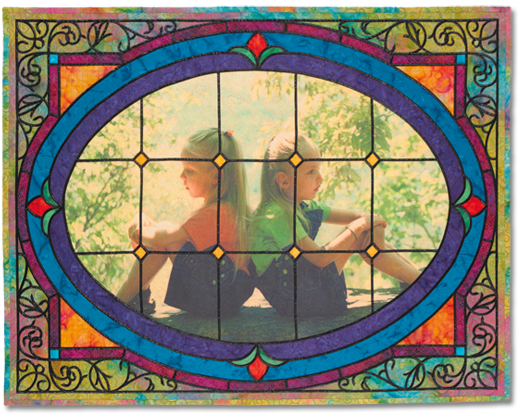
PICTURE PERFECT QUILT
Seek and Ye Shall Find
Copyright 2008


PICTURE PERFECT QUILT
Melissa Quilting
Copyright 2008
PICTURE PERFECT QUILT
God Makes it Grow
Copyright 2008


PICTURE PERFECT QUILT
Psalm 121
Copyright 2008
PICTURE PERFECT QUILT
Matthew 6:26
Copyright 2008


PICTURE PERFECT QUILT
I Will Be Joyful in God My Savior
Copyright 2008
PICTURE PERFECT QUILT
Double Bubble
Copyright 2008

PICTURE PERFECT QUILT
Day Dreaming
Copyright 2008
PICTURE PERFECT QUILT
Be Still and Know That I Am God
Copyright 2008

